Homes
Homes
The Homes page serves as a central hub for managing various aspects within a care facility. Let’s break down the key functionalities:
-
Collector Device Creation: This feature allows you to set up and configure collector devices. These devices play a crucial role in gathering data, alerts, and information from various sources within the facility such as Nursecall or alarm systems.
-
3rd Party Integrations Management: Here, you can seamlessly integrate with third-party systems & care software providers.
-
Cloud User Access: Manage cloud user accounts associated with the home site.
-
Onsite User Creation & Management: Create and oversee user accounts for onsite staff. Assign users to Zones, and maintain a well-organized user base.
-
Zone Configuration: Zones play a critical role in organizing spaces within the facility. Create, modify, and manage zones to streamline alert handling.
-
Callpoint Management: Callpoints are essential devices for residents’ safety and communication. Create, configure, and maintain callpoints to ensure efficient response during emergencies.
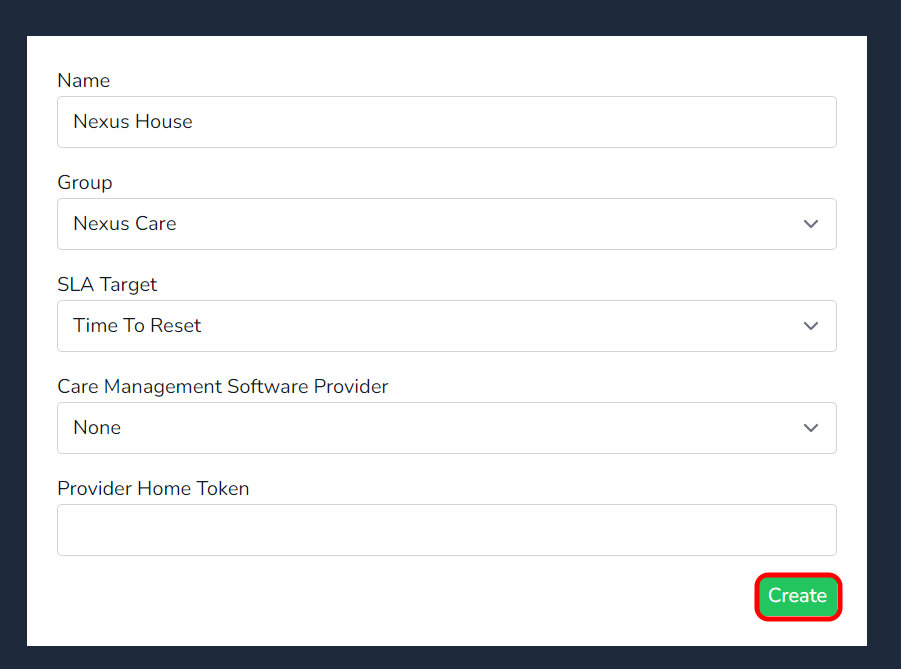
To create a Home, follow these steps:
- Click on the Create button under the Homes tab.
- A pop-up box will appear. Fill in the necessary home details:
- In the Name field, type the name of the home.
- Select the group name assigned to the home from the dropdown.
- Choose the SLA target from the dropdown:
- Time to Reset: Use this setting to show response times based on the call point Reset event.
- Time to Arrival: Use this setting to show response times based on the call point Attendance/Nurse Present event.
Note: If individual call points have a different events programmed then we recommend the SLA Target - Time to Reset option.
-
- Optionally, specify the Care Management Software Provider (you can create this later if needed).
- Click on Create to finalize the home creation.

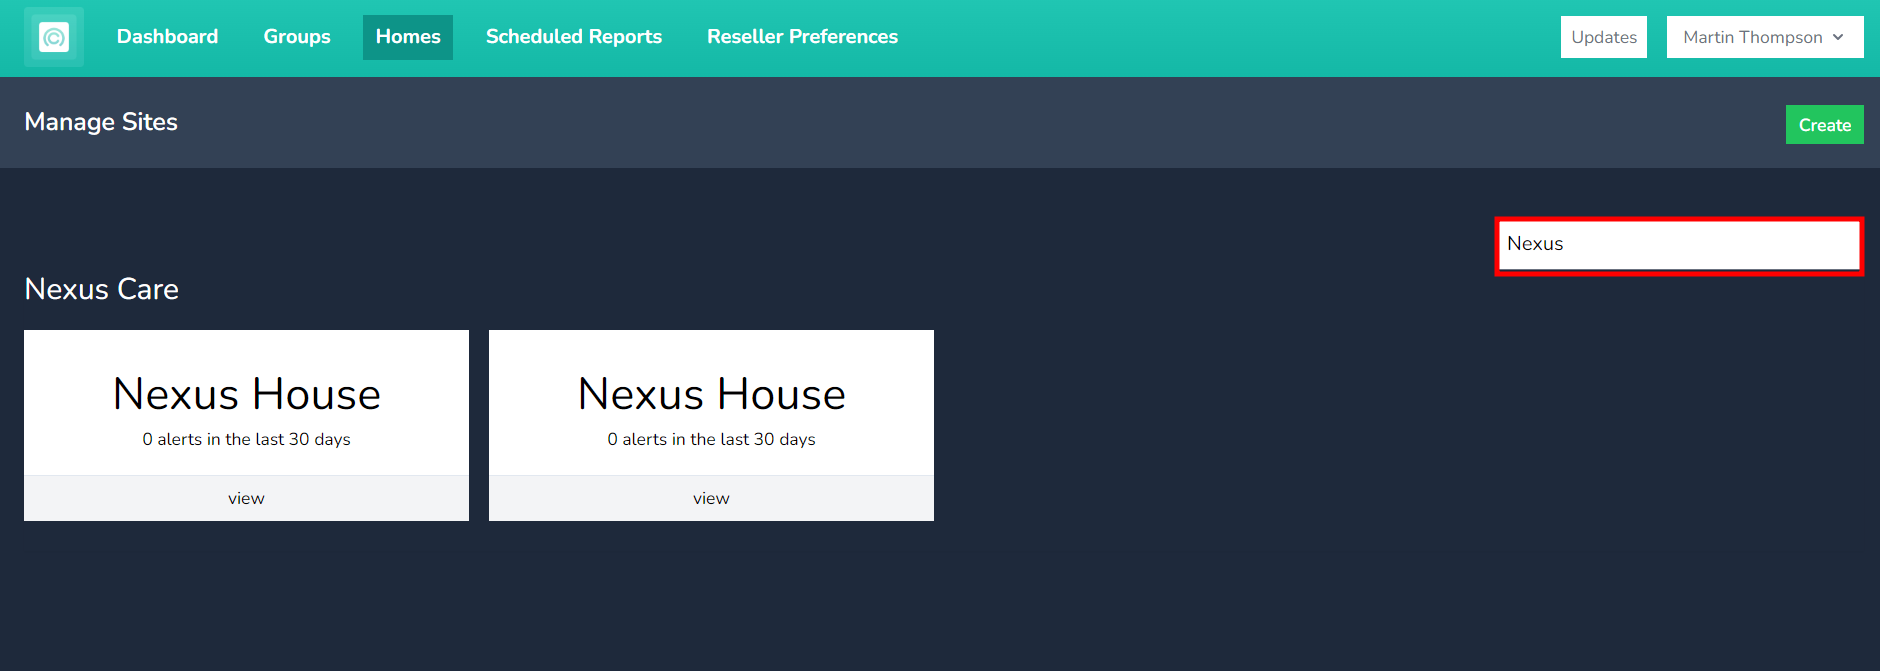
Tip: As a reseller, if you have many homes viewable under the Homes tab, insert the home name into the filter bar (highlighted below) to quickly find the home you need to access.
Next lets add a collector so we can start receiving data from our third party systems. Create a Collector Device
Collectors
Collectors play a crucial role in integrating on-site systems within a care facility. Here are the key points about collectors:
- Purpose: Collectors are responsible for gathering data and alerts from various on-site systems.
- Integration: Currently, integrations with on-site systems are achieved via an RS232/serial output.
- Configuration: Familiarity with configuring the on-site system for data output is essential.
By effectively setting up collectors, you ensure seamless communication, accurate reporting, and efficient management of critical information within the care environment.
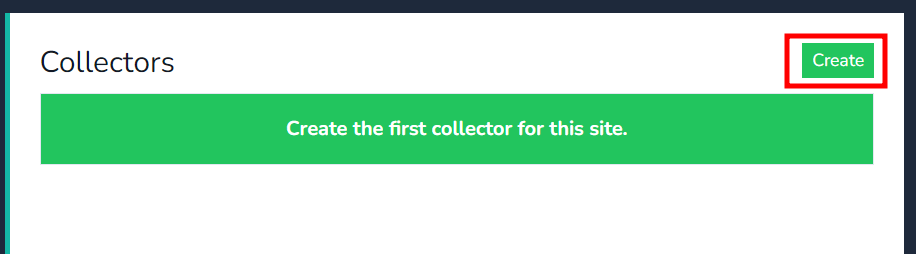
To manually create a Collector for your home, follow these steps:
-
In the Homes tab, click on the Manage button at the top right of the page.
-
Next, click on the Create button
-
Fill in the necessary details:
- Name of the Device: Insert a descriptive name for the collector.
- Nursecall System Type: Select the appropriate type for your system.
- Baud Rate Parameters: Ensure these match the settings of your Nursecall system.
-
Click on Create to finalize the collector setup.


Note: Once created, a Device Authentication code will be displayed. You’ll need this when onboarding the collector.
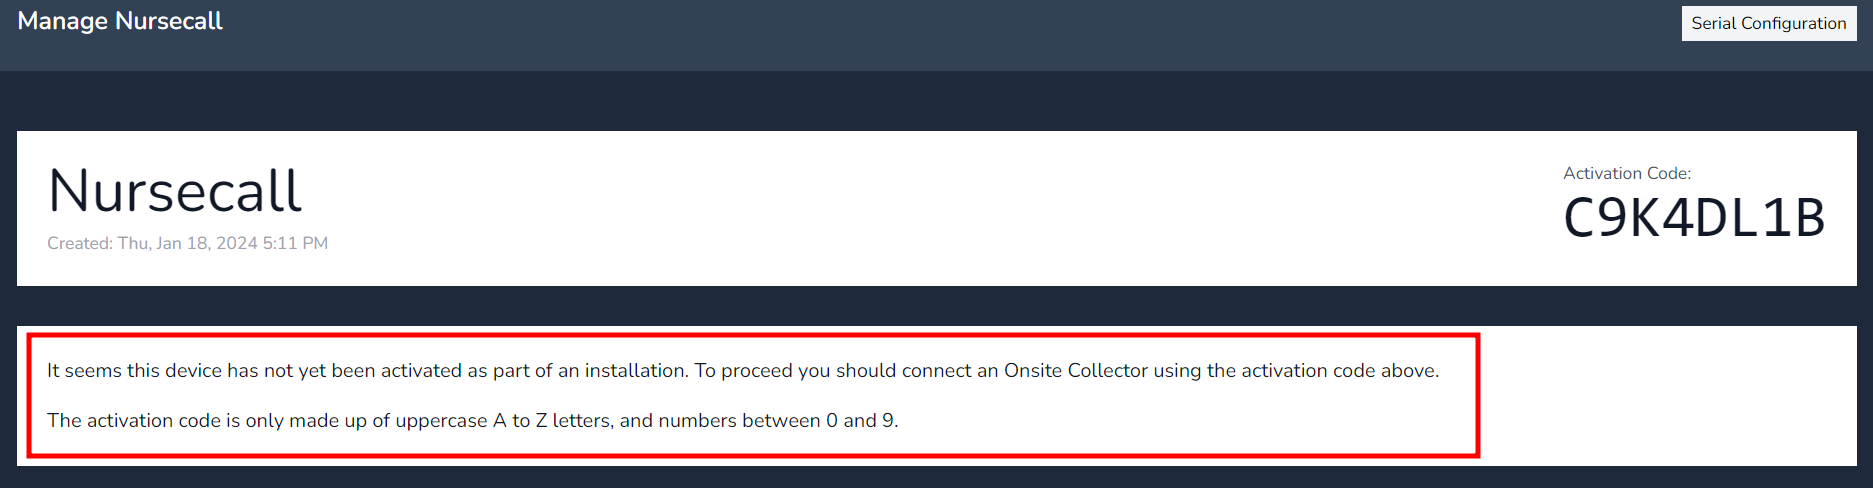
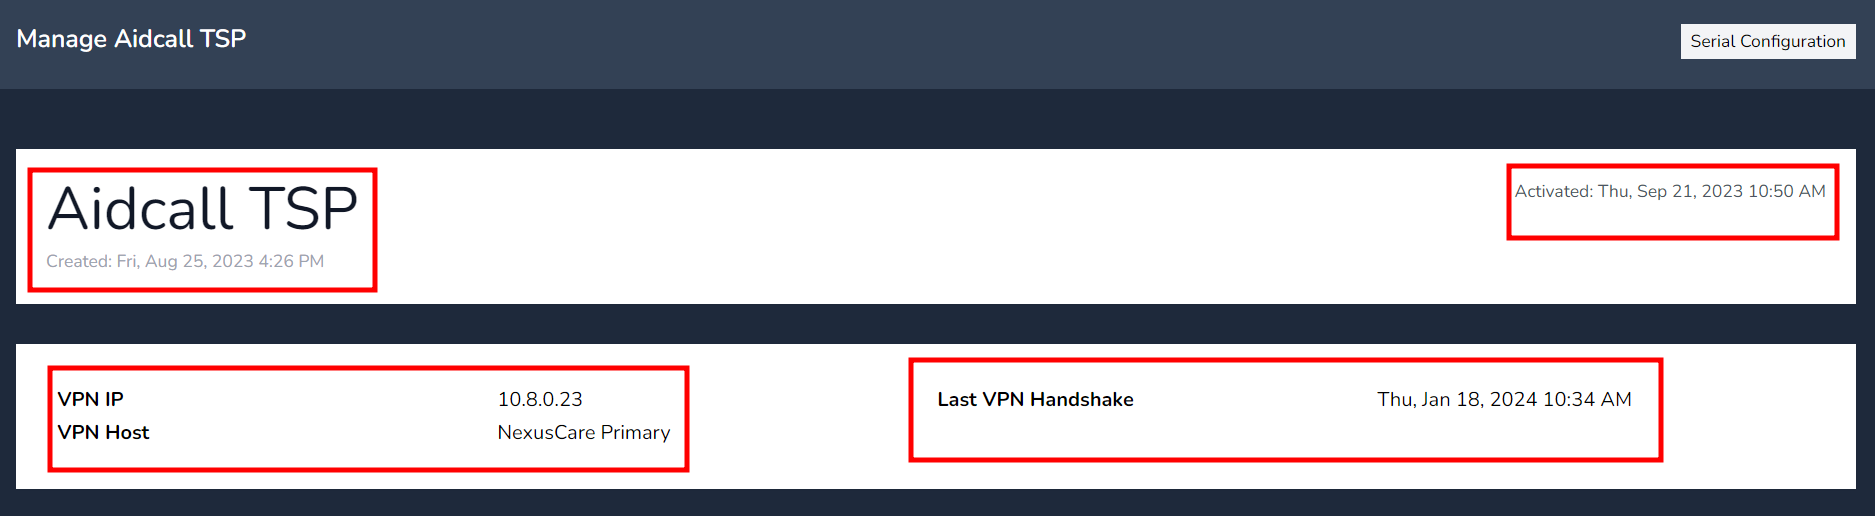
Once the physical collector is onboarded, the Device Authentication code will disappear, and the screen will display relevant data:
-
- Created: The date and time the collector was created.
- Activated: The time the on-site collector was first activated with the cloud site.
- VPN IP: The IP address for the internal VPN network (not the on-site collector’s IP address).
- Last VPN Handshake: The most recent time the on-site collector communicated with the cloud.
Now lets add some Mobile App Users to the cloud site!
Onsite Users
Onsite users play a crucial role in utilizing the mobile application to receive Nursecall alerts. These users are conveniently accessible under the “Home” tab. When it comes to creating Onsite user accounts, there are two options available: manual creation or uploading via a CSV file using the system template. Let’s explore both methods:
-
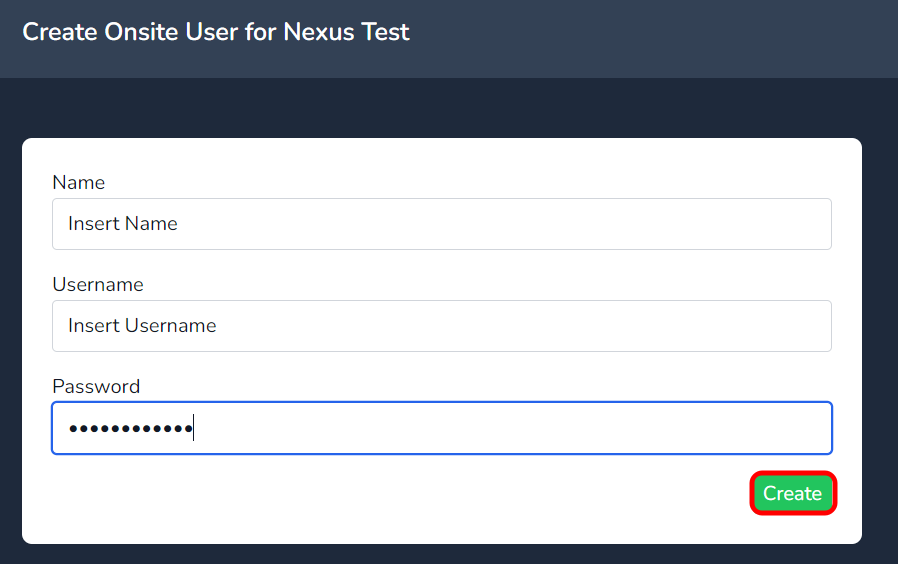
Manual User Creation:
- To manually create a Onsite user, start by clicking the “Create” button under Onsite User tab.
- Input the necessary data into the fields as highlighted below.
- Once all relevant information is provided, press the “Create” button to complete the process.

- CSV Upload for Multiple Users:
-
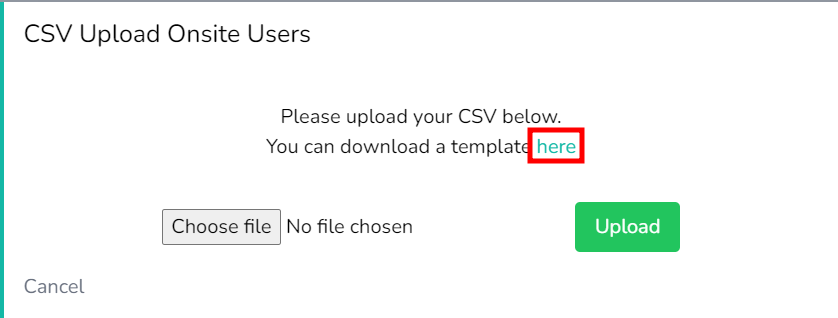
- For bulk user creation, select the “Import CSV” button.
- Download the CSV template by following the link highlighted below.
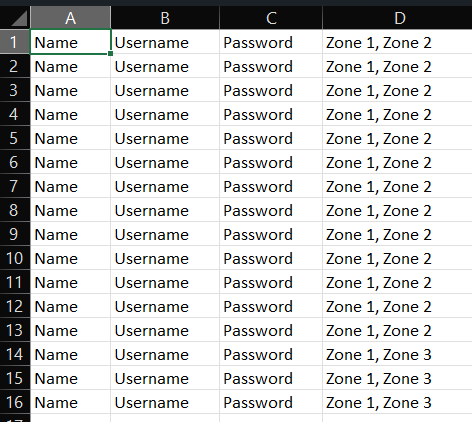
- Review the downloaded CSV template to ensure data is inserted correctly (as per the table format).
- Save the file to a location on your PC.
- Note: Adding zones to the CSV document will automatically create those zones within the system when uploaded.

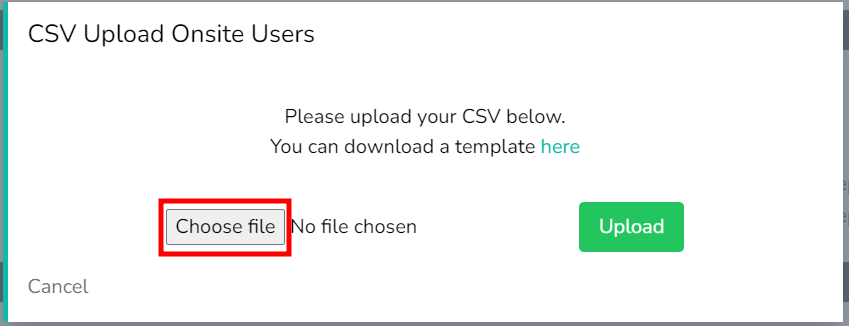
- Uploading the CSV File:
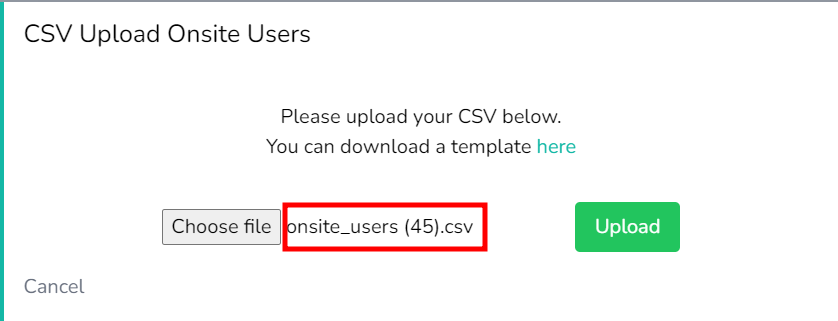
- Click the “Choose file” button to select the CSV document saved on your PC.
- Once the file appears next to the button, click “Upload.”
- Be patient during the short upload delay. DO NOT click the upload button more than once.
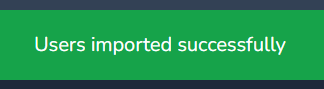
- You’ll receive a success message once the upload is complete.
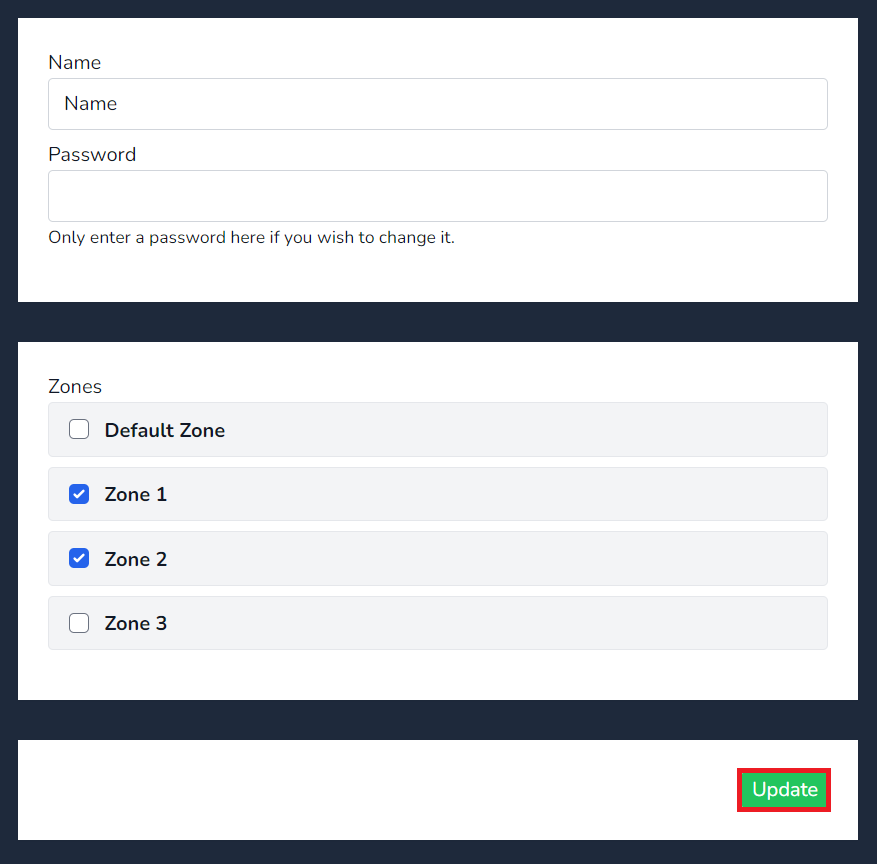
- Assigning Users to Zones:
- To apply or view a user assigned to a specific zone, simply select the relevant zone(s) they need to be a member of.
- Press “Update” to save the changes.
If you've not added Zones to the templates you'll need to add some manually, if you have, lets head to the Rooms page!
Zones
A Zone serves as the location where Rooms reside. Users can sign in to a specific zone to receive nursecall alerts. It’s an essential organizational structure that ensures efficient communication and timely response within a care facility.
Tip - When adding zones to the Onsite user or Rooms CSV template, it streamlines the process, and the zones are automatically created.
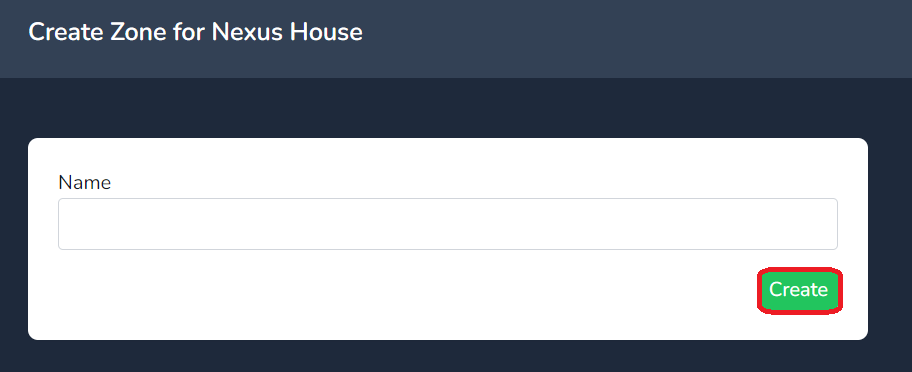
To manually create a Zone, follow these steps:
- Click on the Create button located on the right-hand side of the Zone field.
- Enter the desired name in the Name field.
- Click on Create to finalize the creation of your zone.
Your zone is now successfully created! If you need to edit the name of a zone, select the Manage link as shown below.


Rooms
A Room serves as a designated space where Callpoints can be located individually or grouped together. Its primary function is to collect alerts and organize them, ensuring accurate reporting to care management software. By centralizing these alerts, the Room ensures that they are appropriately filed and associated with the correct resident.Let’s explore the three ways to create Rooms:
-
Automatic Creation: Rooms can be generated automatically, perhaps through a system process or predefined rules. This method ensures consistency and efficiency.
-
Manual Creation: If specific customization is needed, Rooms can be manually created. Caregivers or administrators can set up Rooms individually, tailoring them to unique requirements.
-
CSV Upload: For bulk creation or migration, Rooms can be imported via a CSV (Comma-Separated Values) file. This approach simplifies large-scale setup and ensures data accuracy.
Choose the method that best suits your needs, and let the Rooms facilitate efficient alert management!
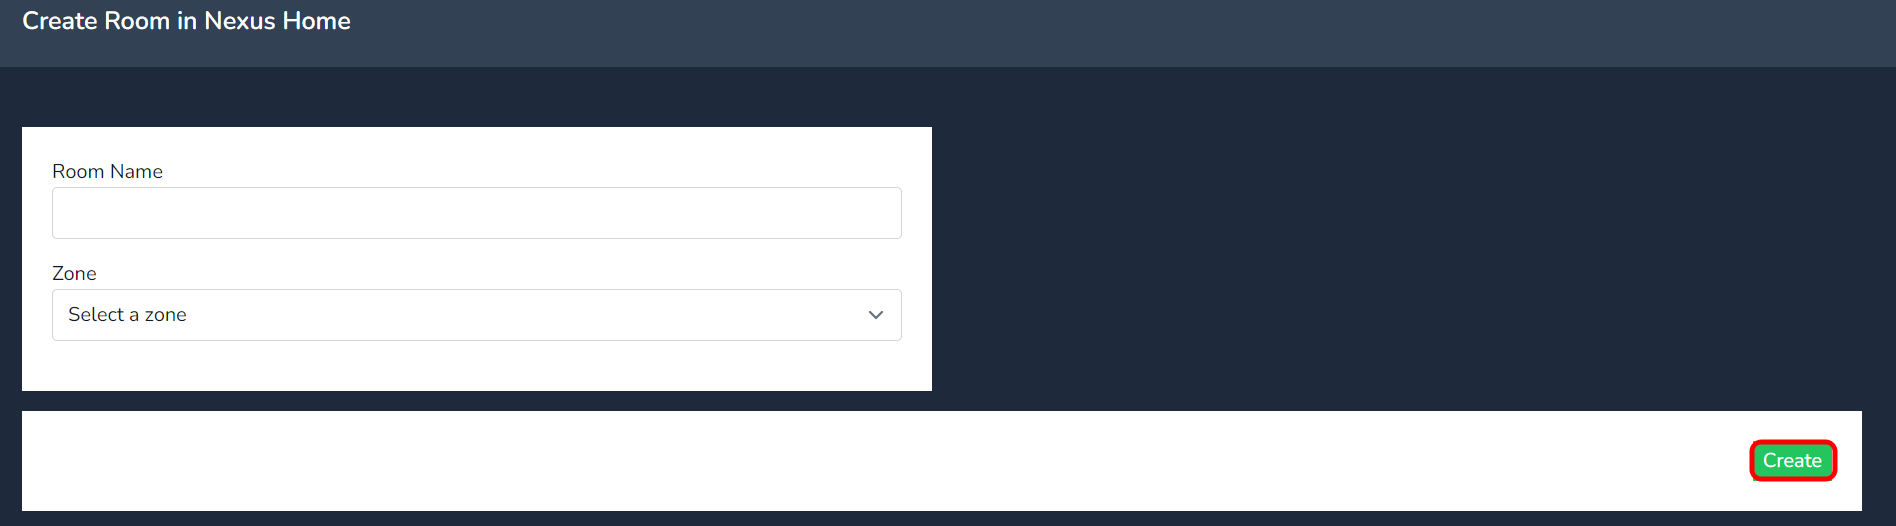
To manually create a room, follow these steps:
- Click the Create button.
- Add the room name and select the zone from the dropdown menu.
- Click on Create to finalize the room creation.

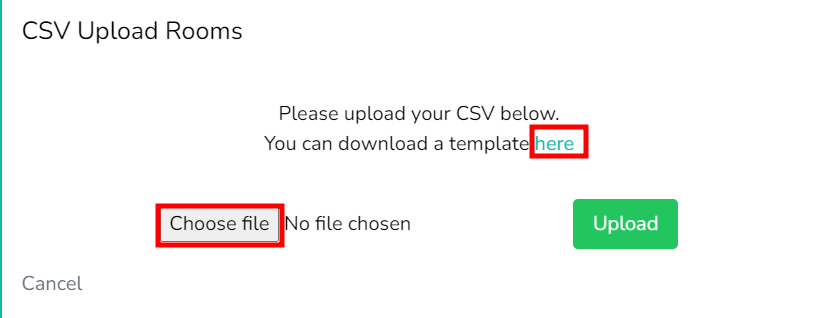
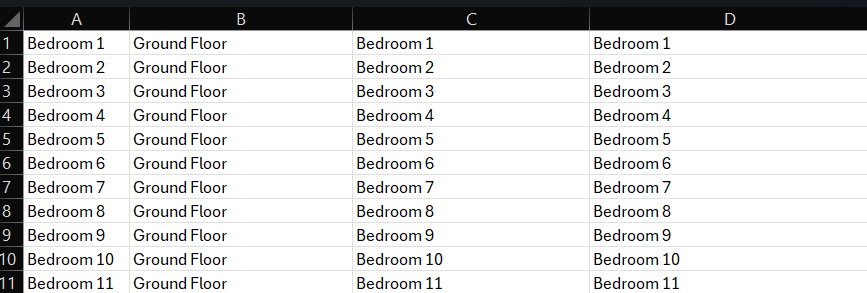
For CSV upload you can download the template CSV file by clicking on the link highlighted below.
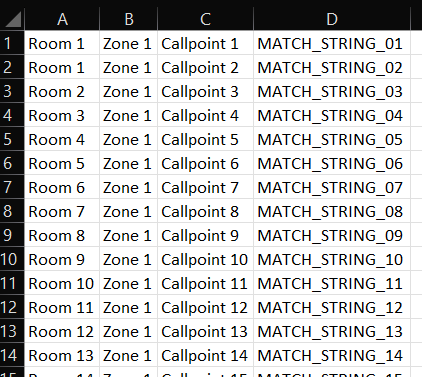
The CSV should include the following information:
- Match String: Must match the data in the Nursecall system.
- Call Point: Name of the Callpoint device.
- Zone: The Zone the Room will reisde in.
- Room: The room to which the Callpoint is assigned.
Default Template Downloaded
Example Template to be uploaded
As a minimum the MATCH STRING in Colum D must match the data value being outputted via the Nursecall system
When uploading do not press the upload button more than once. This will create duplicated data.
Select the Upload button
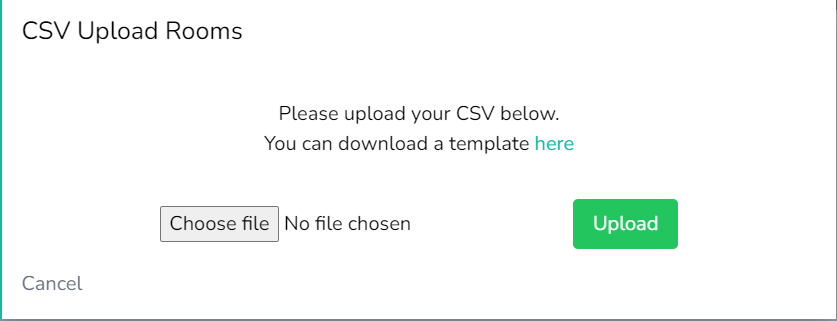
Once Uploaded a success message will appear.

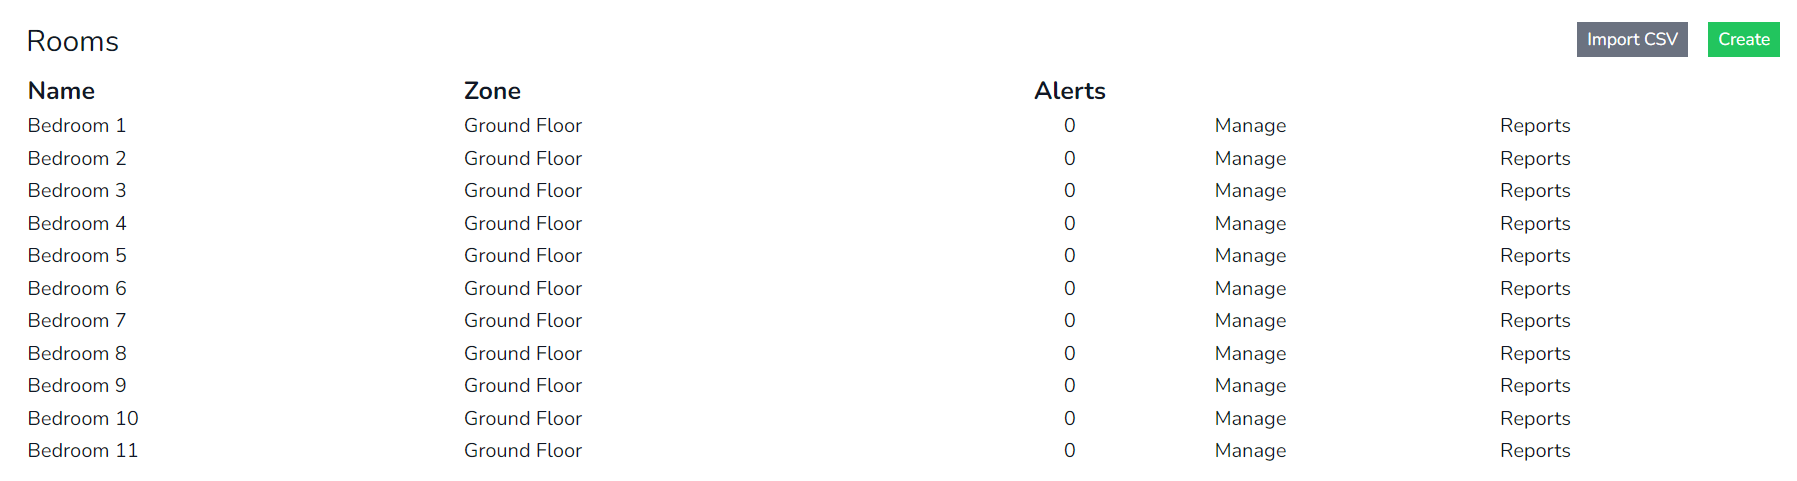
View the Rooms Data Uploaded in to the cloud site.
For further information on Room Management & how to group callpoints to rooms, select the link here
Rooms Management
Let’s explore the features of room management in more detail:
-
Edit Callpoint or Room Name:
- With room management, you can easily edit the callpoint (a unique identifier for a specific location) or the room name.
- Editing a Room Name will change the name display to the mobile app.
-
Grouping Rooms for Simplified Reporting:
- Room management lets you group callpoints under one room.
- By doing so, you simplify reporting by having one report for a resident.
-
Creating Callpoints and Match Strings:
- When you manually add a room, you only create the room but not the match string or callpoint you can simultaneously create a callpoint and a match string.
- When you manually add a room, you only create the room but not the match string or callpoint you can simultaneously create a callpoint and a match string.
Group Callpoints to a Room
-
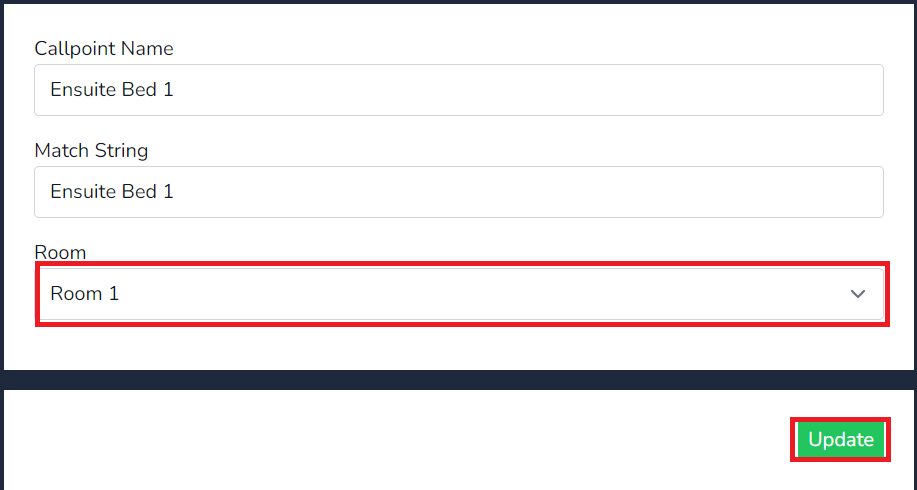
When configuring your callpoints, you can group them within a specific room for streamlined reporting. Let’s walk through an example:
- Imagine you have an Ensuite Bed 1 callpoint.
- Select Manage against Ensuite Bed 1
- Select Manage under the room field
- In the dropdown menu, select Room 1 to associate Ensuite Bed 1 callpoint with the Room named Room 1
- When you generate reports, all callpoint data grouped with Room 1 will be consolidated for easy resident reporting.

Now you've created the cloud site, lets head to On-Boarding the Collector to Cloud