Creating Onsite Users
Onsite users useplay a crucial role in utilizing the mobile application with their log-in details to be able to receive Nursecall alerts.
OnsiteThese users are locatedconveniently accessible under the home“Home” tabtab. When it comes to creating Onsite user accounts, there are two options available: manual creation or uploading via a CSV file using the system template. Let’s explore both methods:
-
Manual User Creation:
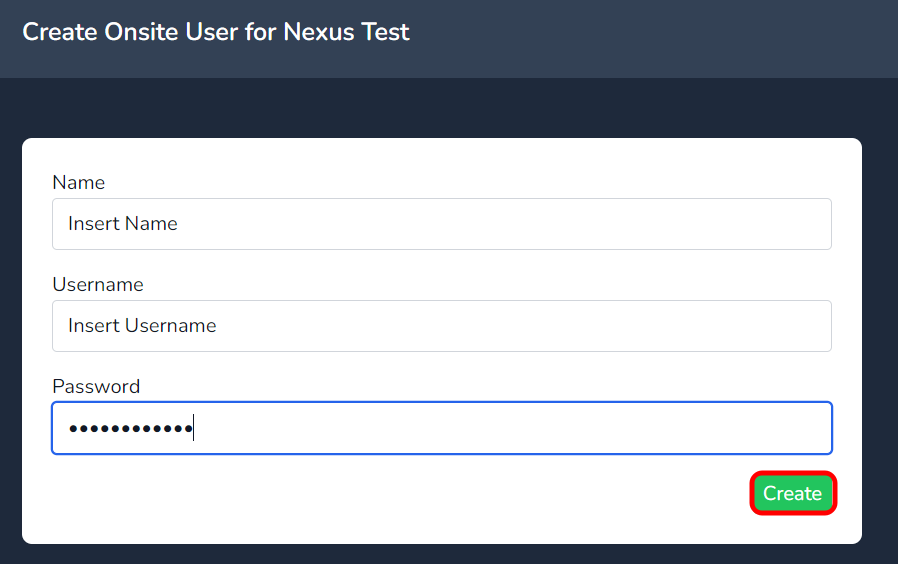
- To manually create a Onsite user, start by clicking the “Create” button under Onsite User tab.
- Input the necessary data into the fields as highlighted below.
- Once all relevant information is provided, press the “Create” button to complete the process.
-
CSV Upload for Multiple Users:
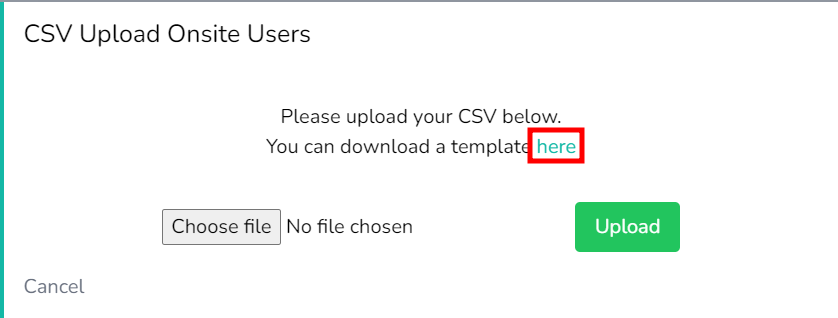
- For bulk user creation, select the “Import CSV” button.
- Download the CSV template by following the link highlighted below.
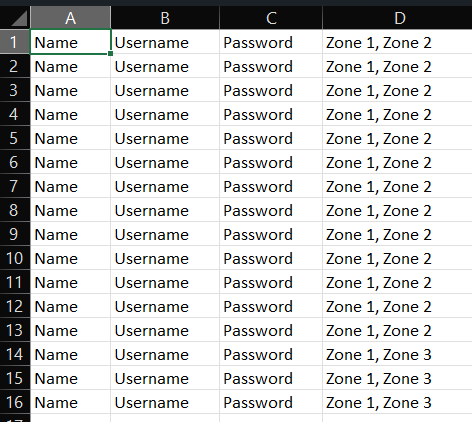
- Review the downloaded CSV template to ensure data is inserted correctly (as per the table format).
- Save the file to a location on your PC.
- Note: Adding zones to the CSV document will automatically create those zones within the system when uploaded.
-
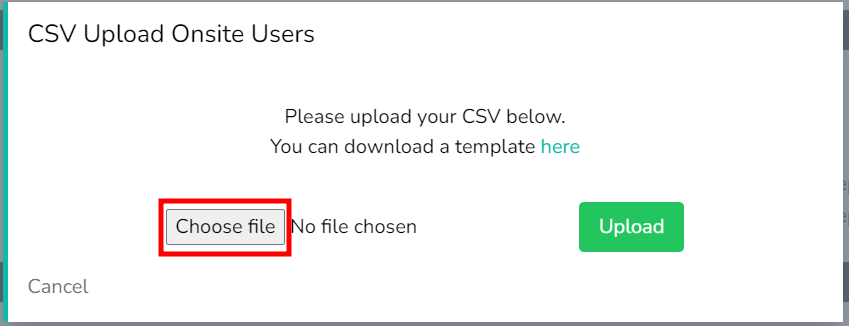
Uploading the CSV File:
- Click the “Choose file” button to select the CSV document saved on your PC.
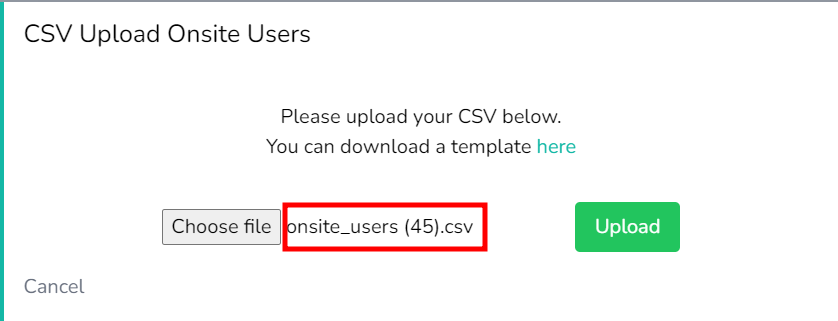
- Once the file appears next to the button, click “Upload.”
- Be patient during the short upload delay. DO NOT click the upload button more than once.
- You’ll receive a success message once the upload is complete.
-
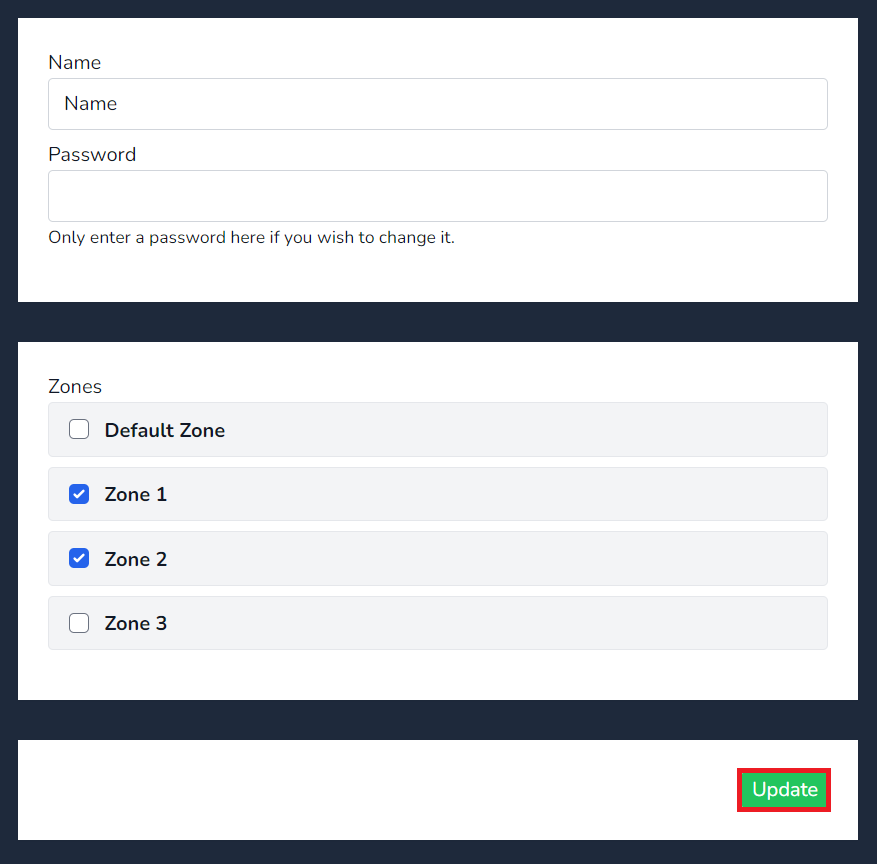
Assigning Users to Zones:
- To apply or view a user assigned to a specific zone, simply select the relevant zone(s) they need to be a member of.
- Press “Update” to save the changes.
!Assigning Users to Zones
Remember that efficient management of user accounts ensures seamless communication and timely response within your Nursecall system.
There are two options on how to create a user, manually create or upload via csv using the system template.
First, click on the create button to manually create a user.

Insert data in to the fields as highlighted below & press create.
To upload multiple users via csv, select the Import CSV button

Select the link highlighted below to download the CSV template.
Next, view the CSV template downloaded to assist with inserting the data in the correct format. as per the below table. Once data has been entered, save the file to a location on your PC.
Note; Entering the zones for the user to be a member of will automatically create the zones in the system.
Click on the Choose file button to select the CSV document saved.
Select the CSV file saved to to the location on your PC and once it appears next to the Choose file button, you can click upload.
Only click Upload once. There is a short delay while uploading, wait 3 seconds and you will get a success message as per the below.

To apply or view a user assigned to a zone, simply select the zone or zones they need to be member off and press update